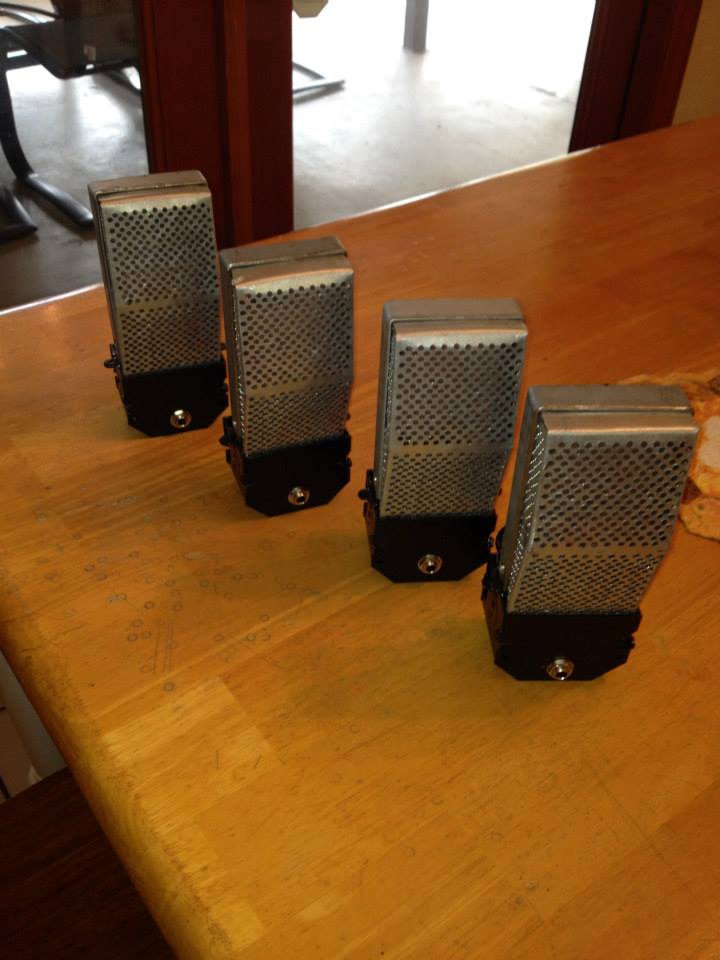
I want to show you the process I went through years ago in making my own microphones. My Alma matter Alumni theater group was putting together a live radio drama. They couldn't find multiple working (or even fake) old time radio microphones. I decided to tackle the project. My goal was first to be stage-worthy (robust), second to look the part (small imperfections were okay), and third to be opperational (working microphone). For our project we wanted four identical mics. Here was my process:
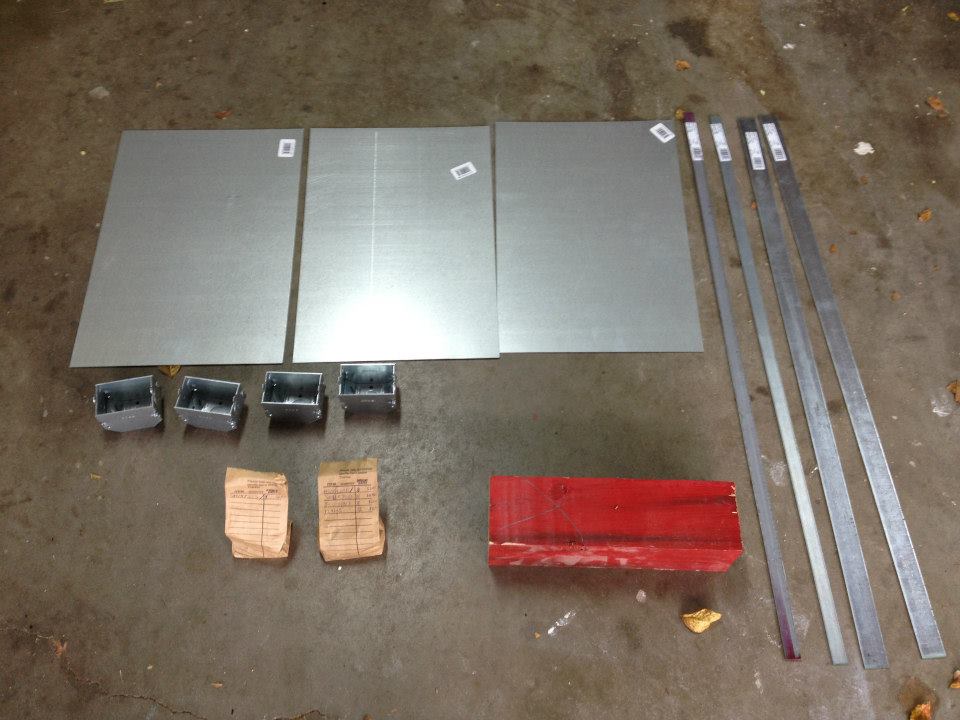
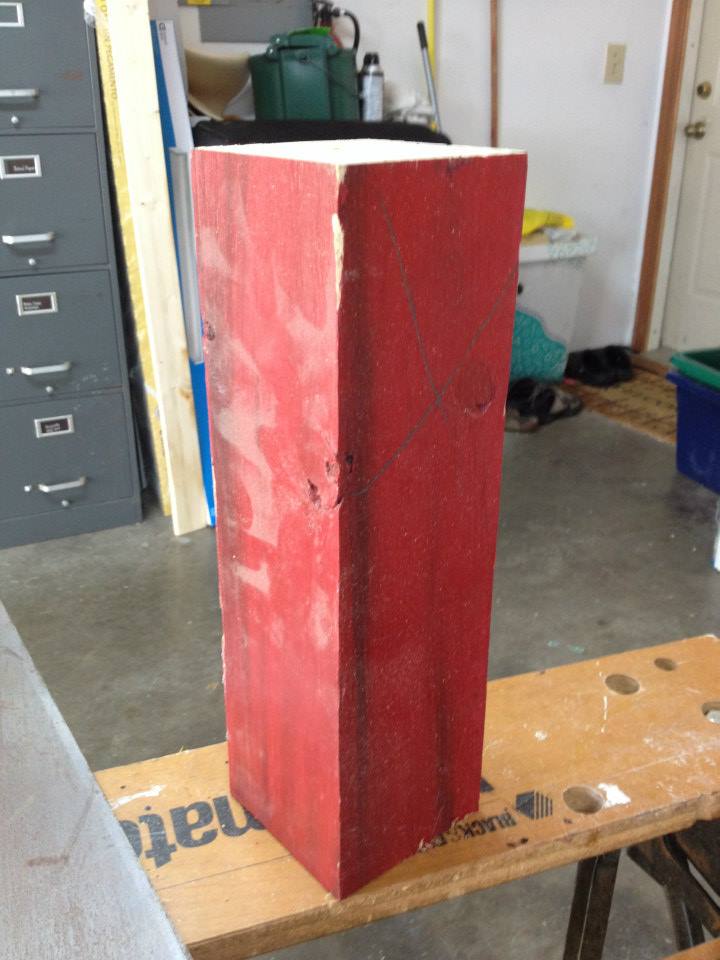
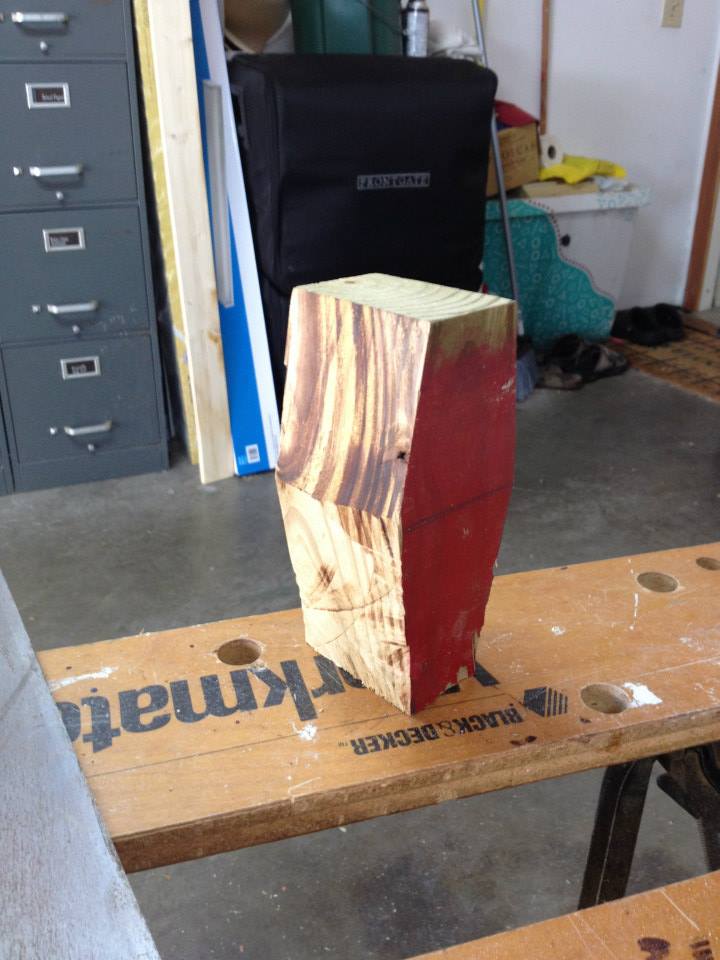
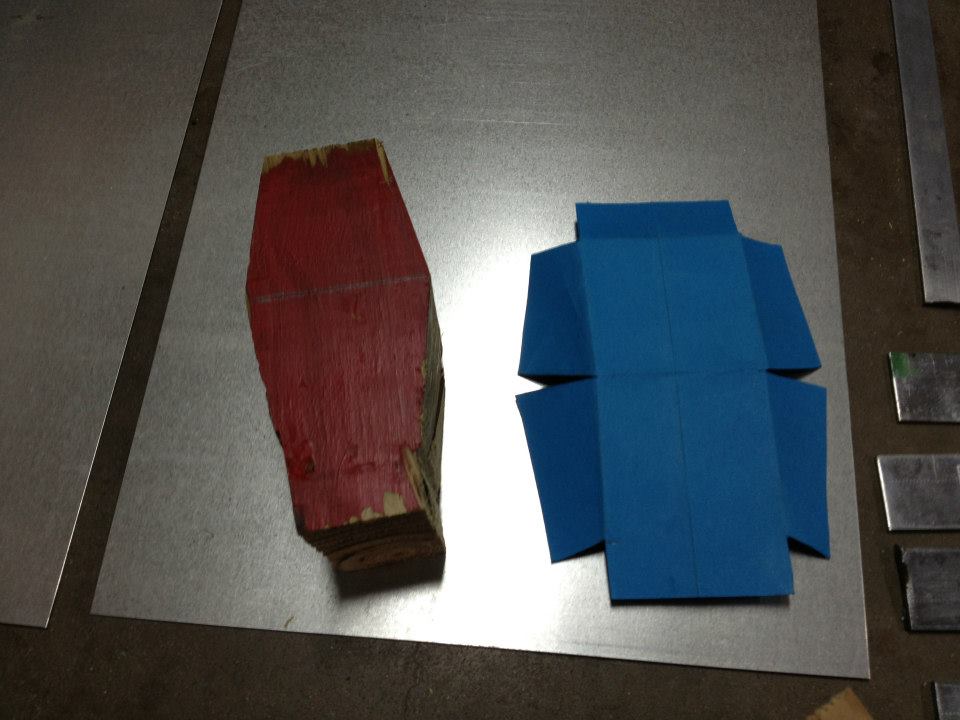
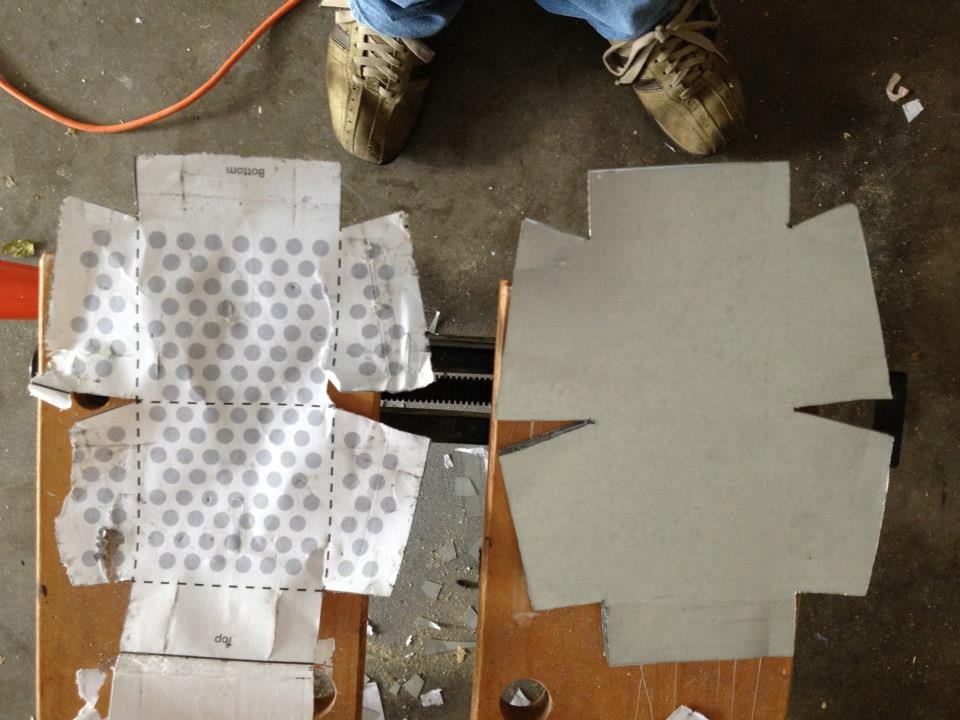
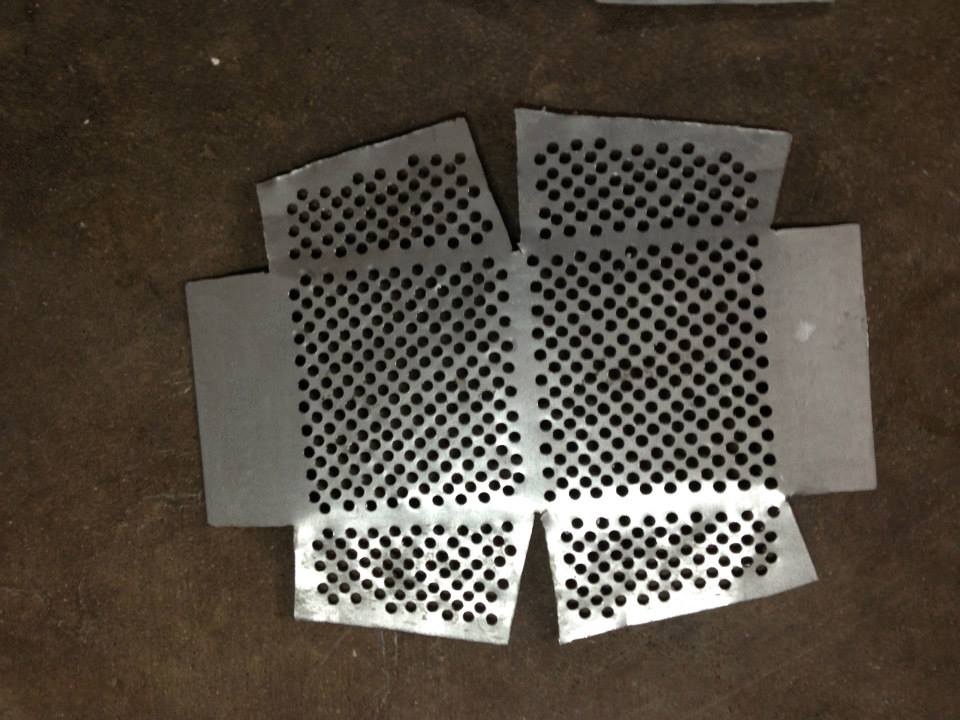
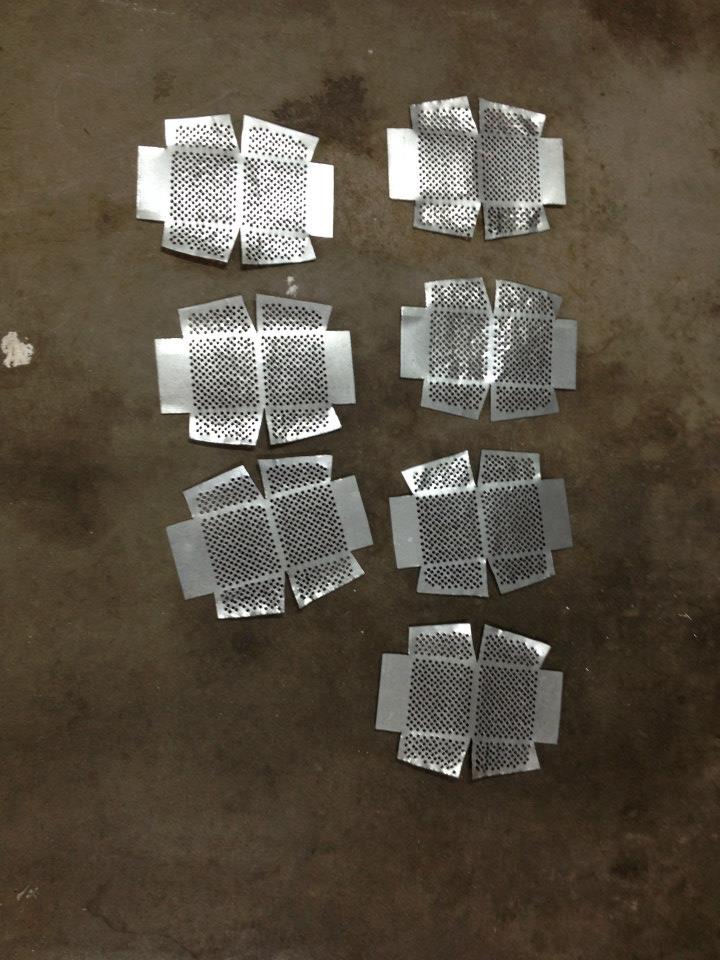
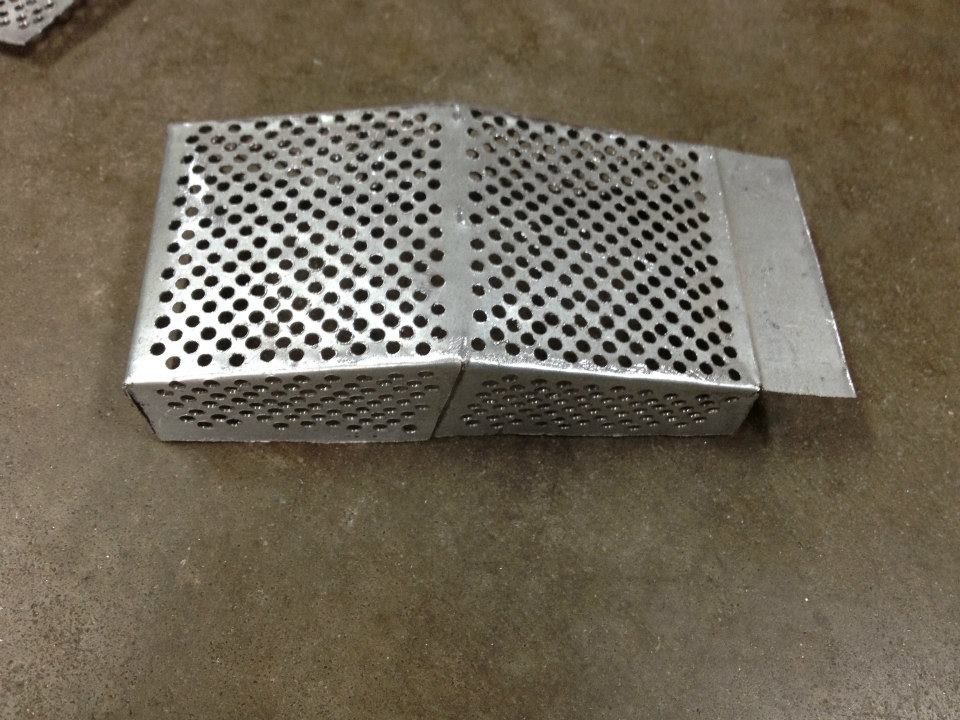
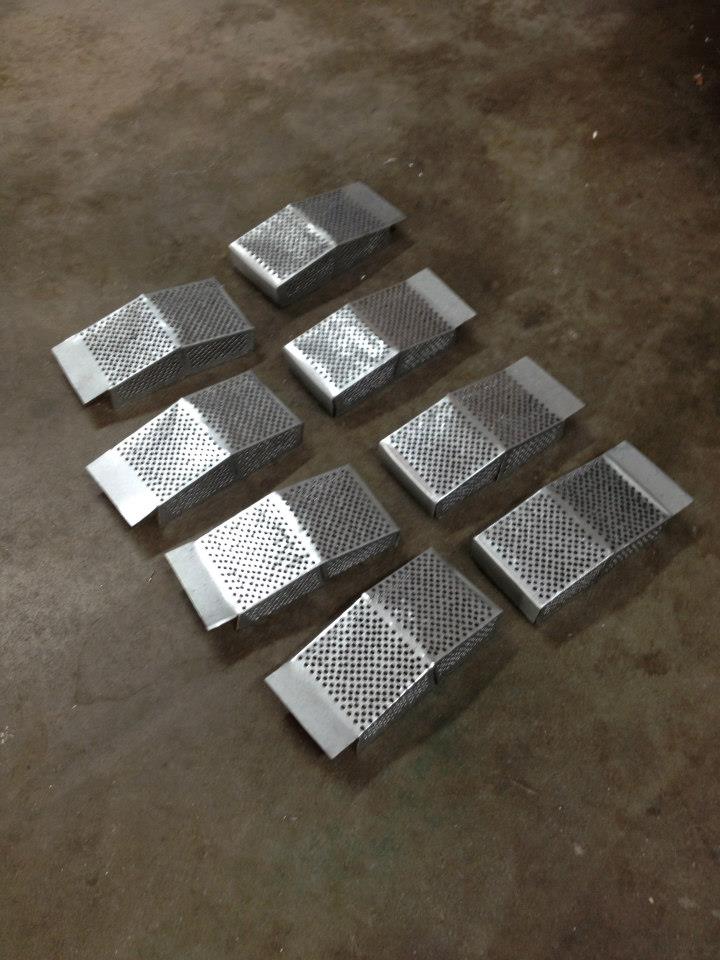
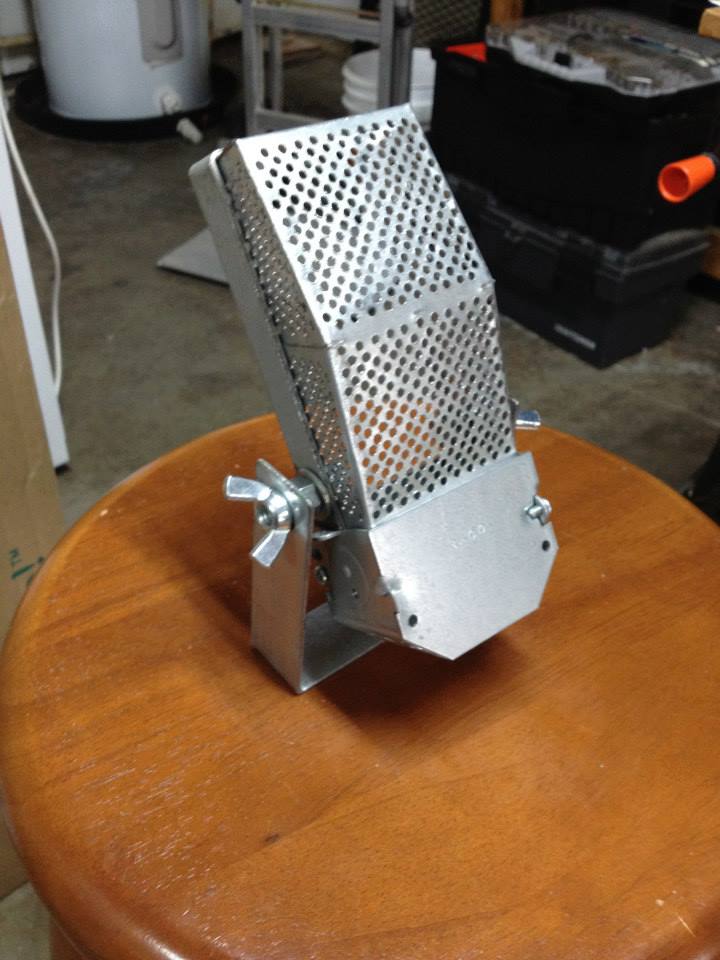
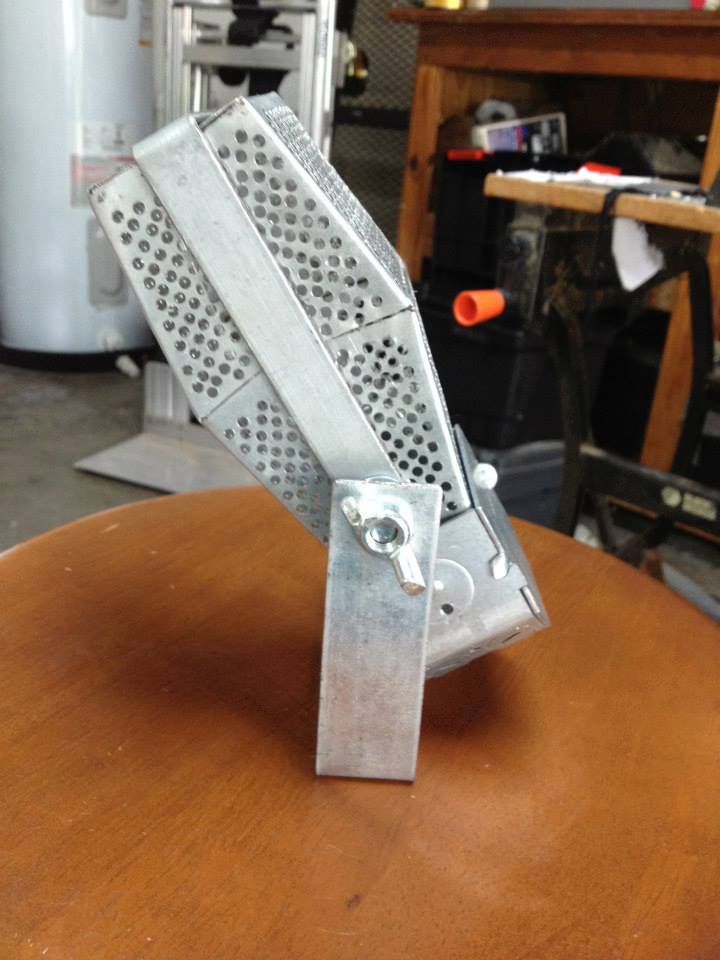
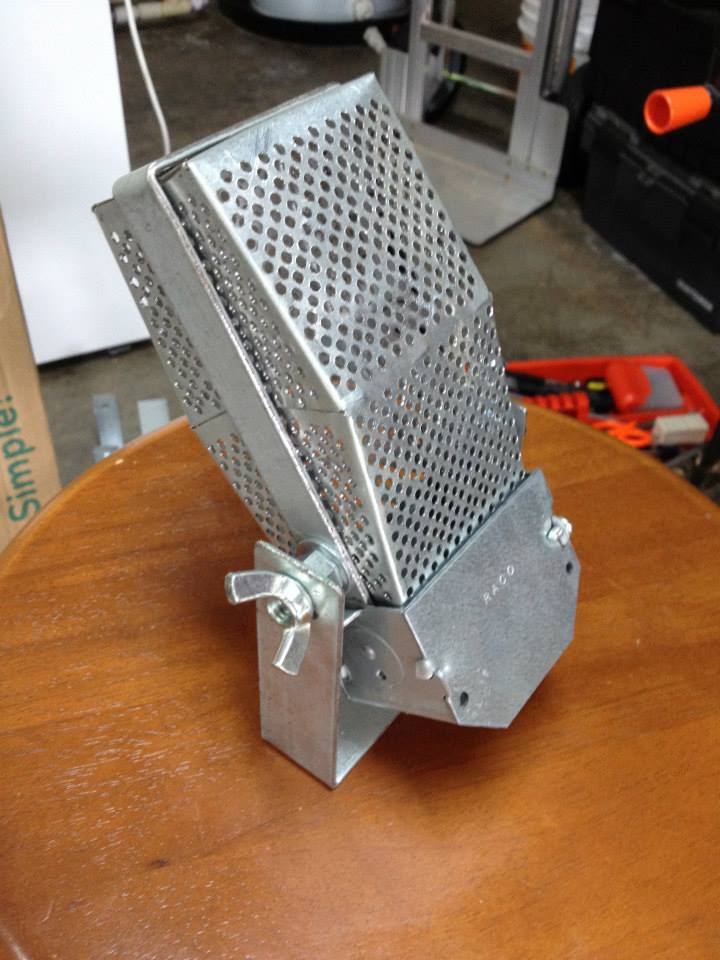
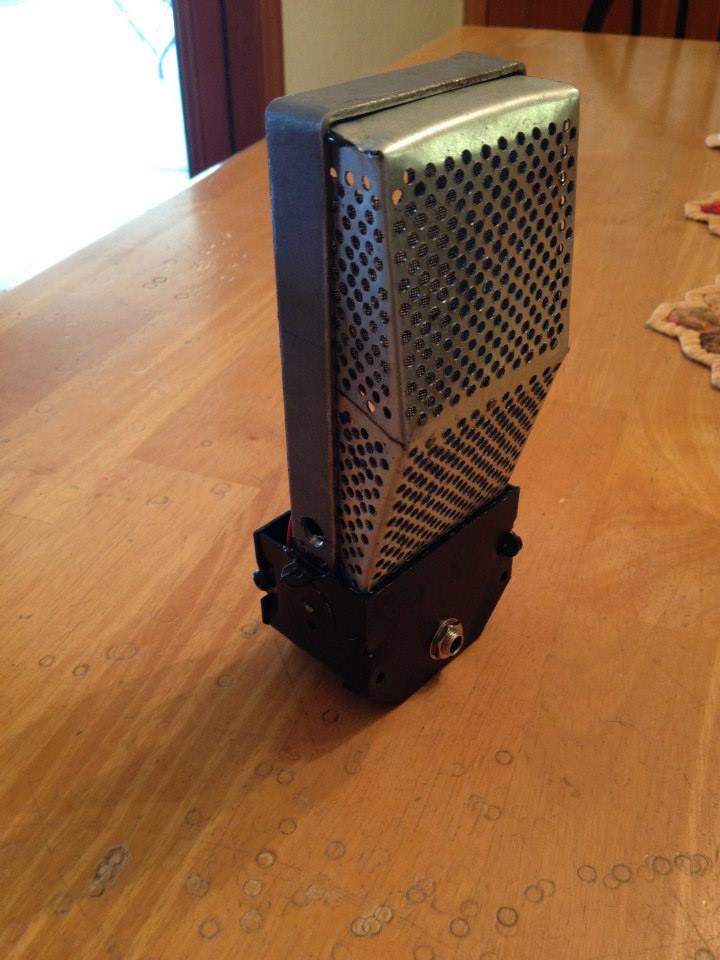
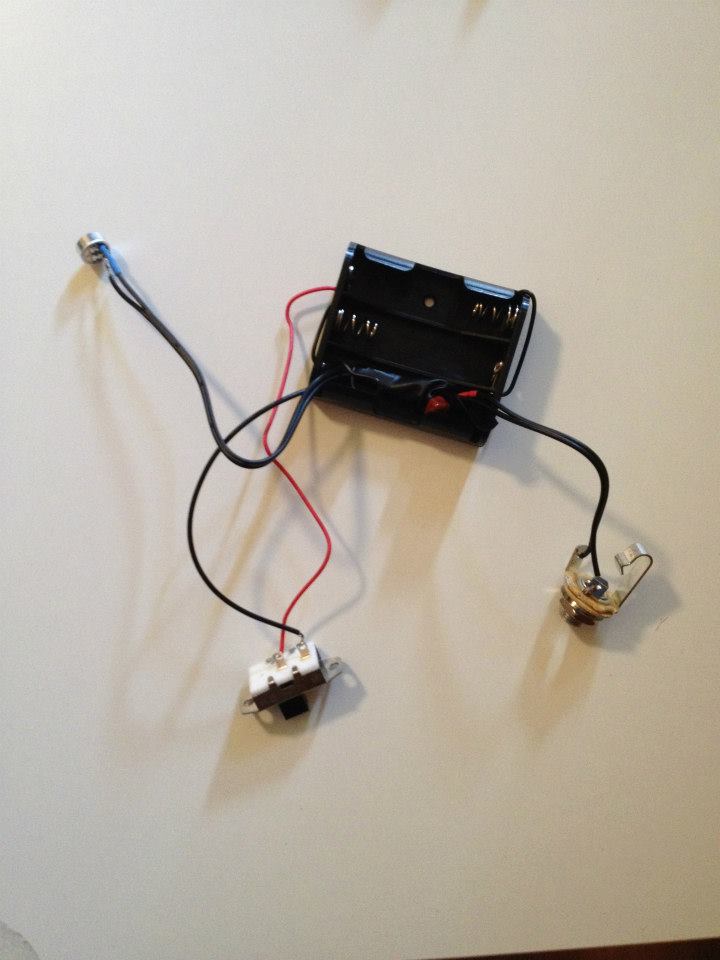
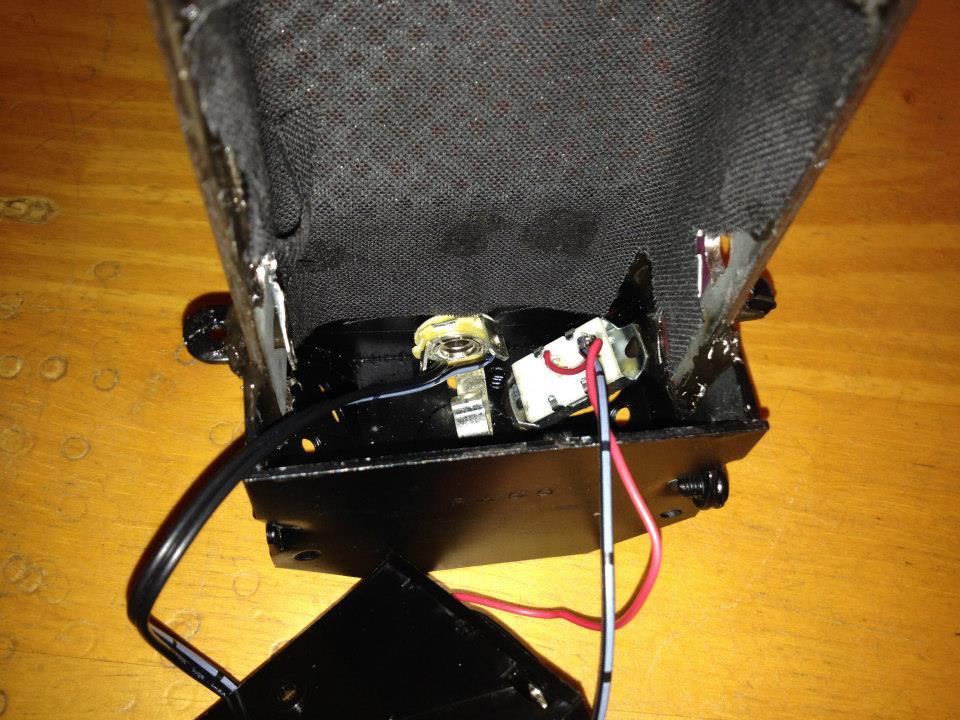
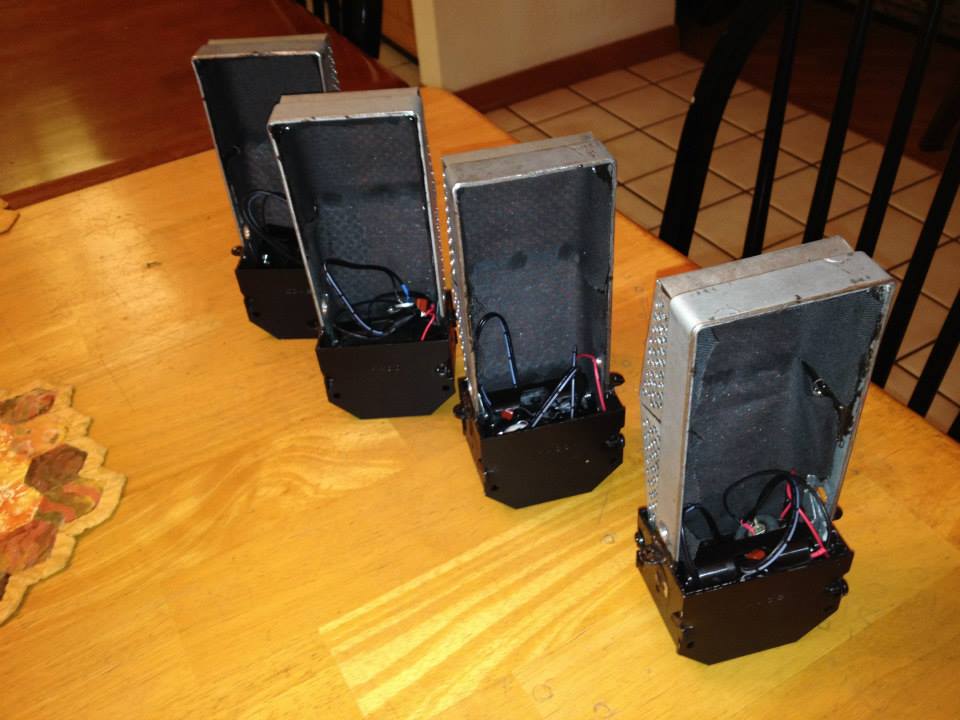
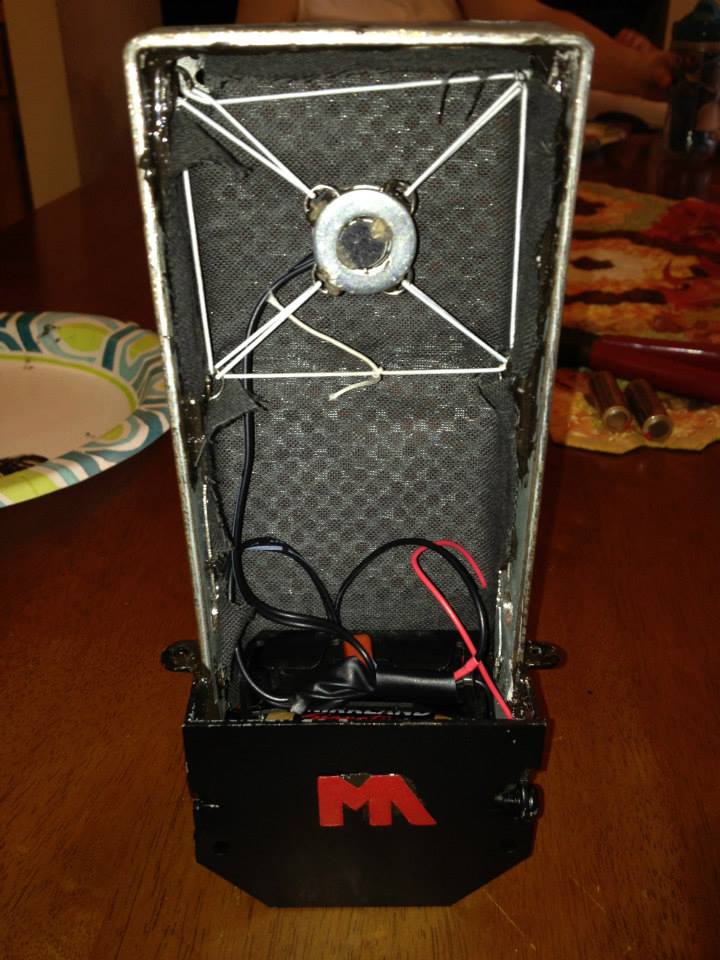
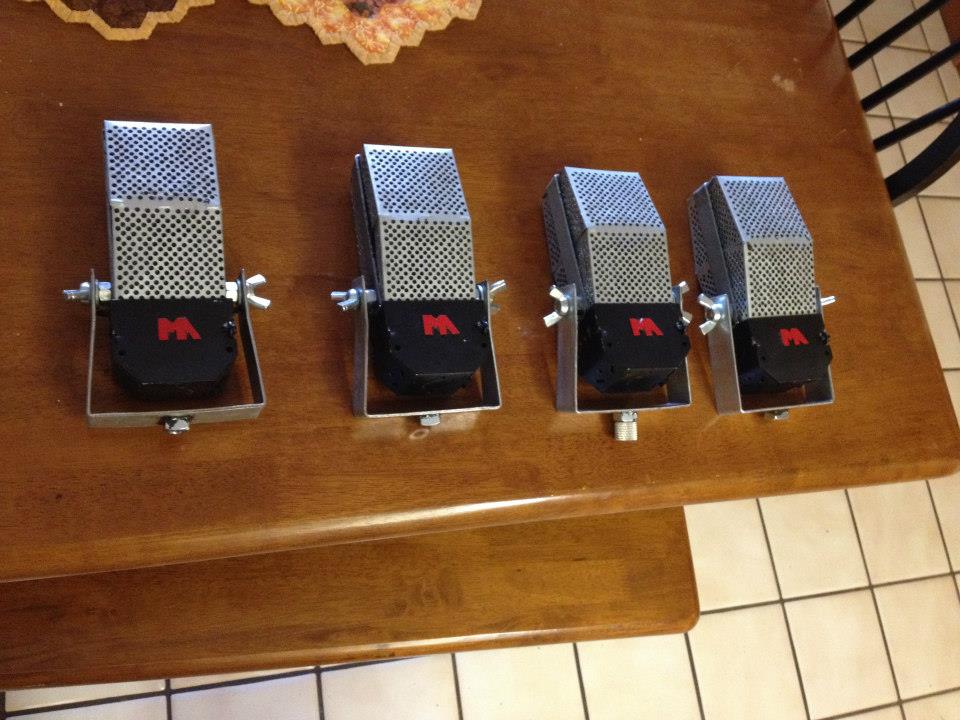
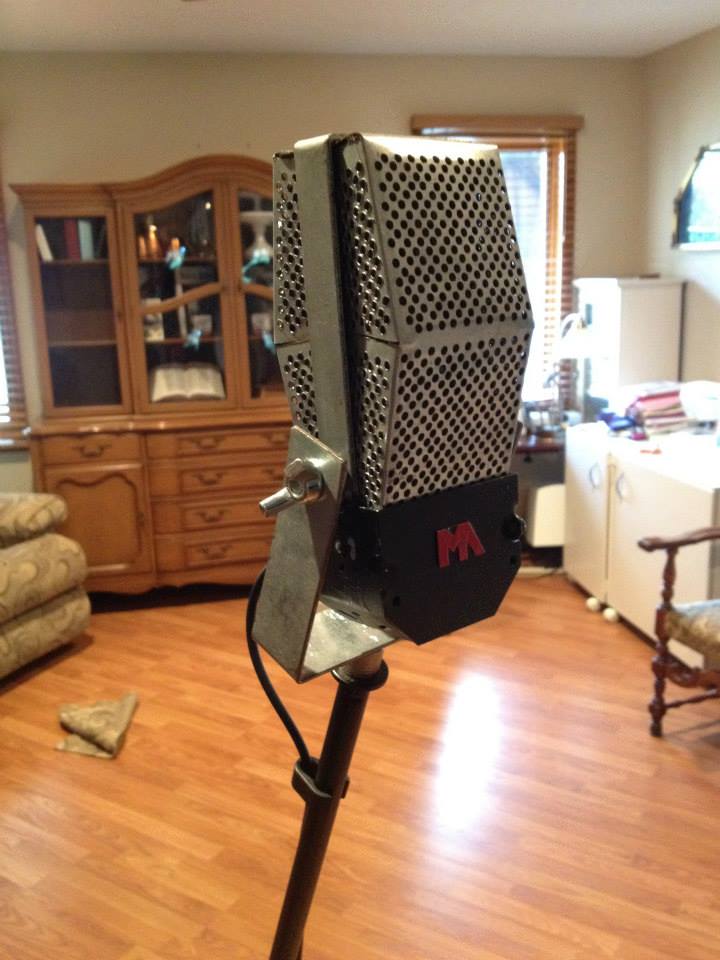
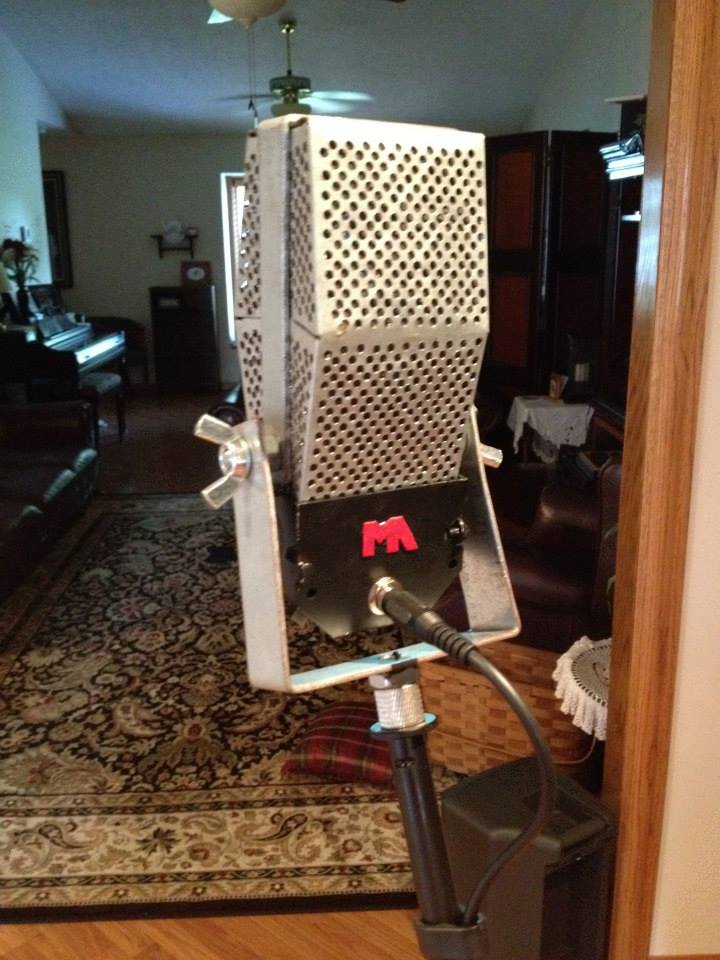
1. The materials: Sheet metal, Flat metal rods, electrical boxes, bolts, nuts, washers, wing nuts, and a block of wood. All sizes are completely variable, depending on the look you want.Any scrap of wood will do2. Shave it down to the shape of what you want the foil frame to look like. Match the template bottom with the size of the electrical box so that the template sits just inside the box.3. Shape a piece of paper around the wood template and cut to obtain a flat version4. It's preferable to digitize the paper template created earlier so you can print as many versions as you need. Overlay the template onto the metal sheets and use a hacksaw or jigsaw to cut the metal. Multiple layers will cause problems when they vibrate. Single layers are easier, even if they take longer.5. The foil frame hole size is negotiable. Here, they are 1/8th inch diameter. Use a drill press to make swift cuts. Here, all layers are done simultaneously. The multiple layers causes issues when the metal warps with heat and other factors. Be prepared for uneven cuts if stacking the sheets.I wanted to make 4 microphones, so I needed 8 matching halves.6. Bend the foil frame at edges. I used a wide vice and hammer to get tight edges. All 8 halves bent 7. Shown here: Bottom wide rod, bent twice to form a square 'U' shape (measured to approx 1-2cm around electrical box base). The top thinner rod is also bent twice to match the wooden template. Holes are drilled at top of wide rod and bottom of thin rod (leaving ample room for the thin rod to extend into the electrical box base). Bolt with washer driven from inside out, with bolt-washer to the wide bottom frame, and then wingnut at end. Triangular notches must then be made in the foil to accomodate the bolt.8. Loose fitting with both halves of the foil lined up and inserted into the base.9. Base painted black.10. Foil is J-B Welded onto the frame and base.11. Top left is the mic capsule. Sleeve wire parallels to negative charge from Batteries then to the sleeve of 1/4 in female plug (far right). Positive lead from batteries passes through on/off switch (bottom left) then through 2.2kohm resistor then parallels to tip lead from capsule. The tip/positive lead then passes through 1uf capacitor then goes to tip lead of the 1/4 in female plug. Add two AA batteries for 3V charge. These components are extremely cheap and aren't going to give steller quality recordings, but for stage vintage use, are quite usable.12. Cloth lining cut to the shape of the foil template is glued inside. The circuitry fits inside the base. In this case, the on/off switch is accessed through a small knock-out in the electrical box.13. The capsule can be placed inside washers. The washers sandwhich four rings. Four rings are also welded to the inside frame. Elastic string suspends the capsule between all eight rings.14. The front foil is set in place and tightened in place with the inside washers to the bolt on outside. Self tightening washers recomended. I also cut out and painted red logos and welded them on to the front and back of the base.15. The bottom frame has 3/8in bolt welded onto the bottom for attachment to mic stands.16. Additional painting/smoothing is all optional. I chose a weathered and used look, retaining all the flaws of the construction process.Ready to use!
This was areally fun project to work on. If I had to do it over I would make some changes both to design, method of constructing, and the flaws I allow. But they have been used often, and, if nothing else, are great stage props!
sic loquimini et sic facite sicut per legem libertatis incipientes iudicari